Published on: August 02, 2024
Views:
--
Expert Insights | Gene-editing Cell For Beginners - HeLa
"Expert Insights For Cells" is here again! In the previous issue, we shared the gene editing tips for the challenging THP-1 cells. We will be glad if you find something valuable to you. In this issue, we will bring you more expert insights for the HeLa cells that are super friendly for gene-editing beginners. Not only are these cells easy to culture, but various transfection methods are also applicable, and the efficiency of gene editing is high.
Talking about HeLa cells, they are stars and powerful assistants in scientific research. According to PubMed, there are over 120,000 scientific papers related to HeLa cells, and they have even contributed to Nobel Prize-winning achievements in multiple fields. Genetically edited HeLa cell lines can be used in research on cancer, cancer treatment, cell death, signal pathways, and other areas. We have carefully prepared the tips for HeLa cell culture and gene editing for you. Let's move on if interested!
Cell Information
Cell Name | Hela (Human Cervical Cancer Cell Line) |
Cell Morphology | Epithelial-like, adherent |
Cell Culture Medium | DMEM + 10% FBS + 1% P/S; |
Culture Environment | Air, 95%; CO2, 5%; 37°C |
Medium Change Frequency | 2-3 times/week |
Passage Ratio | 1:2-1:5 |
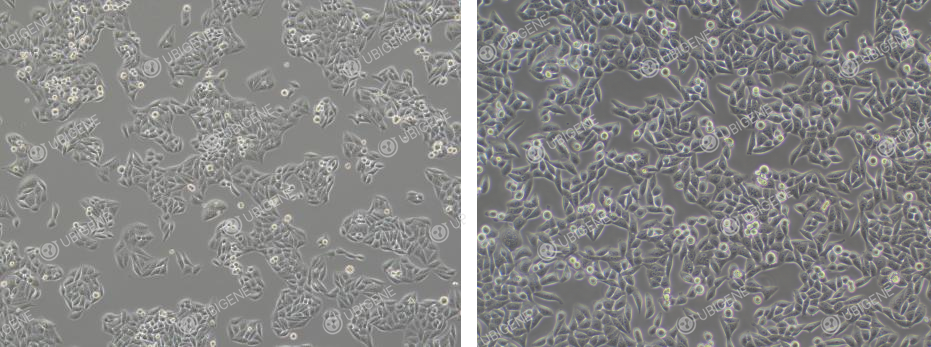
Cell Image (Normal Growth) - It is normal for cells
to be elliptical or spindle shaped
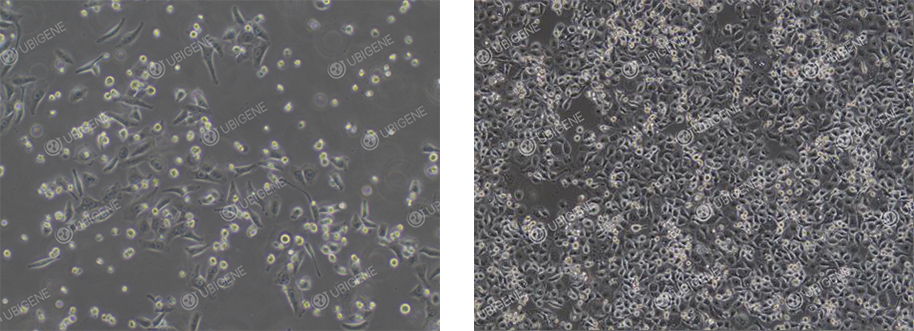
Cell Image
(Poor Cell Condition)
Cell Gene-editing Tips For HeLa
Note For HeLa Cell Transfection
1. Ensure
that the cells are in good condition, in the logarithmic growth phase, with cell density generally
between 80% and 90%.
2. Pay
attention to the digestion time of the cells to avoid excessive digestion, which can damage the cells.
3. During the experiment, cells
should be pipetted into single cells to avoid cell clumping.
4. The viability should be ≥80% when performing experiments with the cells.
5. Before using transfection reagents, ensure thorough mixing to ensure uniformity.
Note For Common Transfection Methods
Electroporation:
1. Control
the amount of cells used
for electroporation experiments and seed them to appropriate size of culture plates or flasks after
electroporation.
2. Ensure that
the cell adhesion rate is ≥70% after electroporation.
3. Control
the experimental time of electroporation to avoid excessively long duration.
Lipofection:
1. Carefully control
the cell confluency before transfection; it should not be too high.
2. Conduct preliminary experiments
before using lipofection for formal experiments to select a suitable transfection system.
Lentiviral
Transduction:
1. Carefully control
the cell confluency before transduction; it should not be too high.
2. Conduct preliminary experiments
before using lentiviral transduction for formal experiments to find the optimal MOI; add Polybrene before
infection.
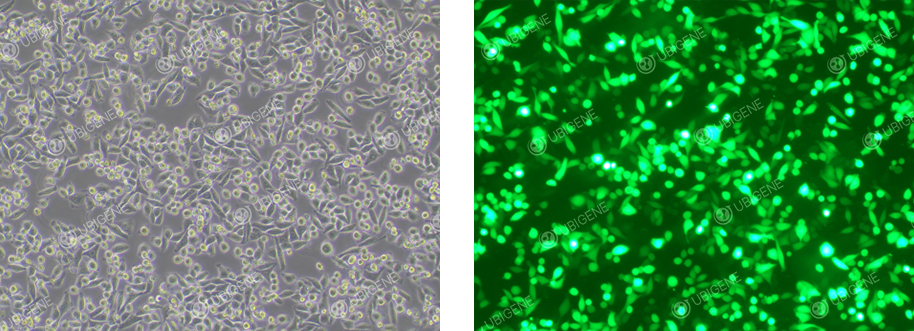
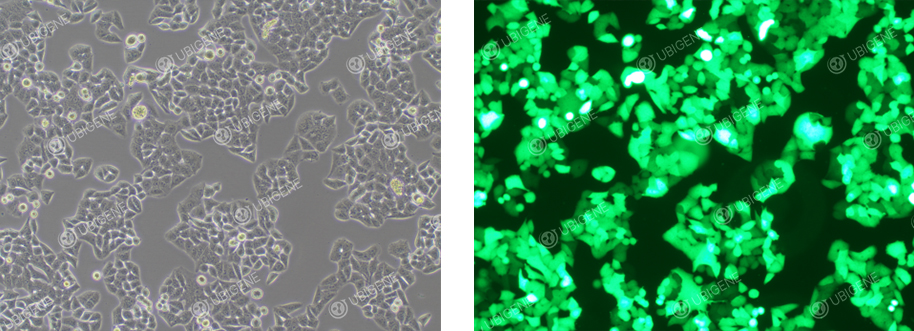
Electroporated HeLa Cells
Lentivirus-transduced HeLa Cells
Note For Single-cell Cloning Of HeLa Cells
1. Ensure
that the cells are in a normal condition before conducting single-cell cloning experiments,
and control the cell confluency between 70% and 80%.
2. Ensure that the cell viability is ≥90% when single-cell cloning.
3. Conduct preliminary experiments
to find a suitable cloning gradient to avoid a low proportion of single clones.
4. For the cell counting of the diluted cells, the best results should be between 1*10^6-2*10^6 cells/mL.
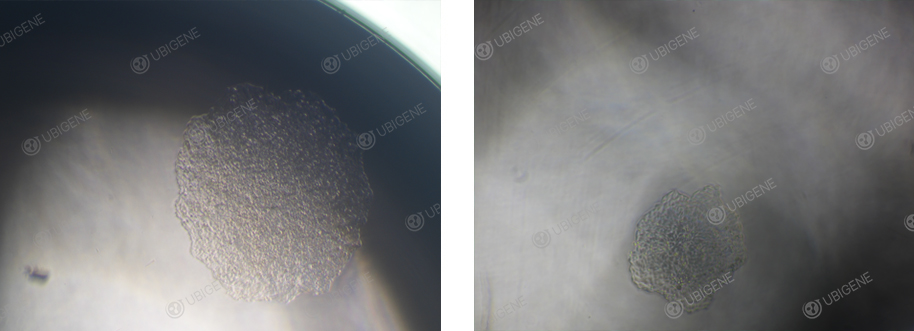
Hela Single-cell clone
HeLa Cell Culture Protocol
Cell Thawing
1. Preparation:
warm up the complete culture medium in 37°C water bath for 30 mins;
2. Inside
the ultra-clean bench, pipet 7 mL of complete medium into a 15 mL centrifuge tube;
3. Take
out the cryopreserved vial from dry ice, hold the cap with forceps, quickly thaw cells in a 37°C water
bath by gently swirling the vial (Note: keep the cap out of the water). In about 1 minute, it would completely thaw;
4. Transfer the thawed cells to the prepared centrifuge tube (step 2) by pipette,
centrifuge at 1100 rpm for 4 mins at room temp to collect the cells;
5. Prepare a new T25 flask and add 4 mL complete medium;
6. After centrifugation, carefully remove and discard the supernatant. Resuspend
cell pellet with 1mL of fresh complete medium and then transfer to the prepared flask (step 5), incubate
the flask in the incubator;
7. Observe the cell condition and adherent situation in the next day.
Cell Passaging (using T25)
1. As long as the cells are 80%-90%
confluent,
it is ready to passage. Inside the ultra-clean bench, remove and discard the medium from the flask and briefly rinse
the cell 1-2 times with 5 mL PBS;
2. Add 1 mL trypsin and
allow trypsin completely cover the cells, place the
flask into the incubator and incubate for 1-3 mins until the majority
of the cells become round and non-adherent as observed under the microscope, a large number of cells detached from
each side when gently shaking and tapping the flask, terminate trypsin digestion immediately;
3. Add complete medium to stop digestion,
the
volume is 2 times of trypsin. Then transfer to a 15 mL centrifuge tube;
4. Centrifuge at 1100 rpm for 4 mins at room
temp. After centrifugation, remove and discard the supernatant and resuspend the cells with complete medium;
5. Passage the cells at the passage
ratio of 1:2-1:5, observe the cell condition in the next day of passaging.
Cell cryopreservation
1. Same as procedures of cell passaging, inside the ultra-clean bench, digest the cells
to a single-cell
suspension, transfer all liquid to a centrifuge tube;
2. Mix well by
pipetting and take 20 μL for cell counting;
3. Centrifuge at 1100 rpm for 4 mins at
room
temp. After centrifugation, remove and discard the supernatant, and resuspend the cells with 1-2 mL of 4℃ pre-cooled
cryopreservation medium, then add cryopreservation medium to adjust to the required density
(1*10^6 cells/mL);
4. Aliquot the cell suspension to pre-labeled cryovials
as 1 mL/tube;
5. Place the cryovials in 4°C
pre-cooled Freezing Container, then put the container in freezers within 15 mins after cell cryopreservation;
6. Stay overnight, transfer the cryovials to
liquid nitrogen for long-term storage.
Tips For HeLa Cell Culture
How to adjust if cells in poor condition:
1. Culture Medium and Serum: Ensure the correct basal culture medium is used and add an appropriate proportion of serum; serum concentration can be adjusted according to cell condition.
2. Cell Culture Environment:
Confirm that temperature, humidity, and air&CO2 conditions are normal.
3. Avoid using expired or long-stored culture media. Freshly prepared complete culture media are recommended to
be used within two weeks.
4. Cell
Passaging and Medium Change: During cell passaging, pay attention to digestion time and trypsin concentration to
avoid cell damage caused by excessively long or short digestion times; generally, perform medium changes 2-3 times
per week to avoid prolonged periods without medium changes.
5. If cells are in poor condition with low cell density, re-digest the cells and seed them into smaller
culture plates to achieve a cell density of at least 70%. Higher cell density promotes cell
proliferation due to increased secretion of cytokines.
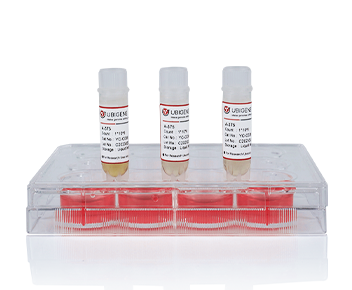
Ubigene Cell Bank, with 5000+ cell lines for your choices, consists of Gene KO Cells, Luciferase-expressing Cells,
Cas9-expressing Cells, EGFP-expressing Cells, Wild-type Cells. STR authenticated and technical support provided.
 Subscribe Us
 Gene Editing Services
 EZ-editor™
 Red Cotton Gene knockout Project


